If you don't have a Vanagon, you may not know about some of the
maintenance issues on the gas tank. They have more connections than most
gas tanks, and the rubber grommets that seal these connections get old
and can leak with age.
After getting the Subaru engine in, and running, I found that the gas tank leaked when it was filled up. It ended up only being a disconnected breather line, but I decided to completely replace the tank and all of the breather lines and grommets.
Unfortunately when I tried to fill it up after installing the new tank, it still leaked just as much. See the post on my second attempt for the solution to that problem. This post may still have some pictures of interest since there are some things listed here that I won't cover on the second attempt.
 |
| I decided to remove the front wheels to give me better access to the vent lines and the top of the tank. I don't really think this was necessary. The best way to get visual access to the top of the tank was to remove the spare tire and holder. Then I could see all of the front vent lines. |
 |
| Set the brake. |
 |
| Got the van on jack stands. |
 |
| Disconnected ground. |
 |
| I pinched the outlet hose, and removed it at the pump. Then I drained the gas into several cans. |
 |
| Here is the main problem that was causing the leak initially (viewed from front spare tire area with tank still in place). I probably could have fixed my problem by replacing the the cross over tube, but I really wanted everything on the tank to be new and good for years to come. |
 |
| This was my first approach to lowering the tank. I later found that my large jack right in the center of the tank worked the best. It also worked good to duct tape a rag to the lift pad on the jack to avoid scratching the newly painted tank. |
 |
| I cut the hoses to the expansion tanks. |
 |
| Removing the trim ring made taking out the filler neck easier. |
 |
| The filler neck came out easily by just pushing it into the tank slightly and turning it to the right. |
 |
| The old tank. |
 |
| I used some scotch bright and sand paper to prep the old tank for paint. |
 |
| The paint fumes got pretty strong, so I got an inexpensive respirator. |
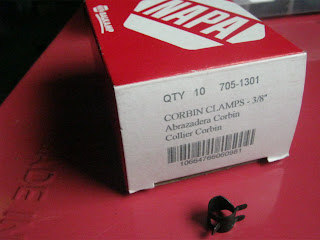 |
| I used these for the lines that go to the expansion tanks. They were a little too small though, and tough to get on. |
 |
| Here is a comparison of the old cross over tube assembly, and the type sold by van-cafe.com I mistakenly thought that the cross over hose was a little too long as it came from VC, to I shortened it. I should have left it the length they had it. |
 |
| Another comparison picture. |
 |
| This shows me twisting the fuel sender in with a screw drive. It was the o-ring on the sender that ended up leaking on the new tank installation. |
 |
| One of the expansion tank hoses. |
 |
| I don't think it's required, but I put some of this stuff on the grommets before installing them. |
 |
| Quite a bit of sealant squeezed out when I installed the grommets. |
 |
| It looks better after the excess sealant is wiped away. |
 |
| This is the filler neck grommet. I used sealant on it too. |
 |
| Since the Van-Cafe cross over tube is a lot thicker than the stock plastic tube, I decided to use a different type of clamp to hold it up in the center. The stock one would have been too small. I used a standard padded cable clamp. This clamp was also a little too tight though. I removed the rubber padding, and replaced it with a large heat shrink tube. This allowed the cross over tube to move freely. This made installation much easier. |
 |
| This is the clamp in place. You can see the emergency brake cable nearby. I think this is the main reason for the clamp. It keeps the cable from contacting the hose. |
 |
| Lifting the tank back into place. I later found that a rag on the jack lift pad worked the best. |
 |
| I replaced the bolts on the tank supports, but the first set I tried were a little too long and contacted the tank slightly. |
 |
| I think the correct length is about 20mm. |
 |
| Initially I just left these hoses long and then trimmed them to length after the tank was installed. |
 |
| Drivers side. Connected expansion tank lines, filler neck, and filler neck breather hose. |
 |
| Fuel outlet reconnected. |
 |
| Return line reconnected. |
 |
| Tank back in. |


No comments:
Post a Comment